
 Some foods are better left to the pros.
Steak, for example. I can never get the doneness just right or a sear that’s consistent from time to time.
Beer is another. After getting all the equipment and going through the multi-week process, our best home-brew was almost as good as a decent beer from a brewery. And that’s before you have to brush all the beer gunk out of the bottom of the bottles before the next go round. The cost-benefit was never quite there for me, and I imagine it wouldn’t be without buying all the gear needed to make pro level stuff.
At the other side of the spectrum, there are foods that, once you make them yourself, the store bought brands will be forever ruined and you will find yourself shelling out for specialized kitchen accessories that are completely useless for other things.
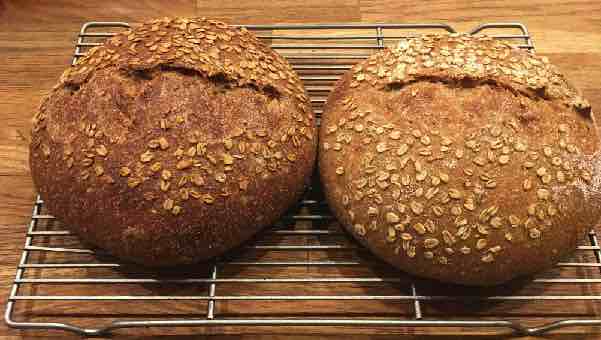
Enter sourdough bread.
This stuff blows away anything you can buy at stores and bakeries. When you use a homemade sourdough starter, you are making a culture of the natural yeast and bacteria that are present in your flour and local area. This is what gives the bread its complex flavors and slightly tangy zip.
Warning: It’s important to know what you’re getting yourself into:
Drawback 1: Taking care of a sourdough starter is a big commitment — along the lines of a fussy houseplant. Sourdough baking requires a certain domesticity of lifestyle because the starter will start to go bad if you don’t feed it every week or so.
Drawback 2: Actually making the bread is a day-long commitment. You’re going to make your dough right when you get up in the morning and it won’t be ready to eat until dinner time, if you wait the recommended resting period before eating the bread (at our house this is sometimes ignored).
Drawback 3: There is potential for domestic conflict over whether the loaves should be gifted or eaten at home. This can get ugly. I recommend scaling up the recipe if you have a bigger bowl because making extra loaves in what is already a daylong process doesn’t require that much marginal effort.
Now that we’re fully disclaimed, let’s dive in.
I think this is my first ever blog post with chapters…
CHAPTER I: STUFF YOU WILL NEED
A. EQUIPMENT
-
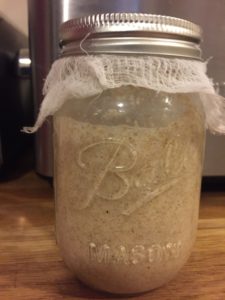
- Mason Jar: a home for your starter
- Cheese Cloth: to cover your starter jar
- Kitchen Shears: to score the bread before baking
- Large mixing tub: For initial mixing and fermentation
- 4 largish cereal bowls: Many recipes I’ve seen call for specialized baskets for letting the bread rise. I just use our normal bowls
- Cooling rack: The sooner it cools, the sooner you can eat it
- Thin cotton cloth: Keeps the dough hydrated while rising
- Dutch Oven: For traps moisture to help the crust develop
- Kitchen Scale: Helps you measure the ingredients accurately
- Spray bottle with filtered water: For spraying some water in the dutch oven
- Parchment Paper: prevents dough from sticking to the dutch oven during baking
B. INGREDIENTS
This recipe makes 4 large round loaves (boules) that can barely fit into a large size freezer bag for storage.
-
- White flour (bread flour or all purpose is fine) (7.5 cups)
- Whole wheat flour (7.5 cups)
- Filtered water
- Sea salt (~6 tsp)
- Rolled oats (optional)
CHAPTER 2: Starter
Searching the internet for sourdough starter tips will make your head spin.
Much of the literature starts with gestures at the old-school Klondike badasses. They would just toss whatever carbohydrates they had lying around into a jar and roll it up in their sleeping bags at night, like, totally unconcerned about getting the right size air bubbles.
“Don’t stress,” they say, knowing full well you, at that exact moment, have 15 browser tabs open agonizing over slight variations to recipes. There are discourses on which flour to use, why you should filter your water, how often to feed it, and of course this epic two-part series, legendary in internet sourdough bread-making circles, on why you should be using pineapple juice in your starter (“The Pineapple Juice Solution.” [part 1] [part 2]).
Starter is flour and water, mixed to a pancake batter-like consistency that has been left out to ferment. As it ferments, the yeast and other bacteria that occur naturally in the flour and in the air will eat the carbohydrates in the flour, producing carbon dioxide. This creates the air bubbles which leaven the bread. Lactobacilli bacteria are the other byproduct. This is what gives you the complex, slightly sour taste.
Online, you will hear tales of hundred year old starters, or ones spawned off some famous, historical starter. But in the long run, the flavor of your breads is going to be determined by your starter (particularly how recently you’ve fed it) and the flour you are using which contain differing types and amounts of naturally occurring yeasts. And because the yeast and bacteria are highly variable from place-to-place, taking a genuine San Francisco sourdough starter and transplanting it to a different climate is just going to kill off the San Fran yeasties, replacing them with local strains.
So it’s fine to spawn your starter from an existing one (this will shortcut the process), but totally not necessary.
To start a new starter from scratch here’s the drill:
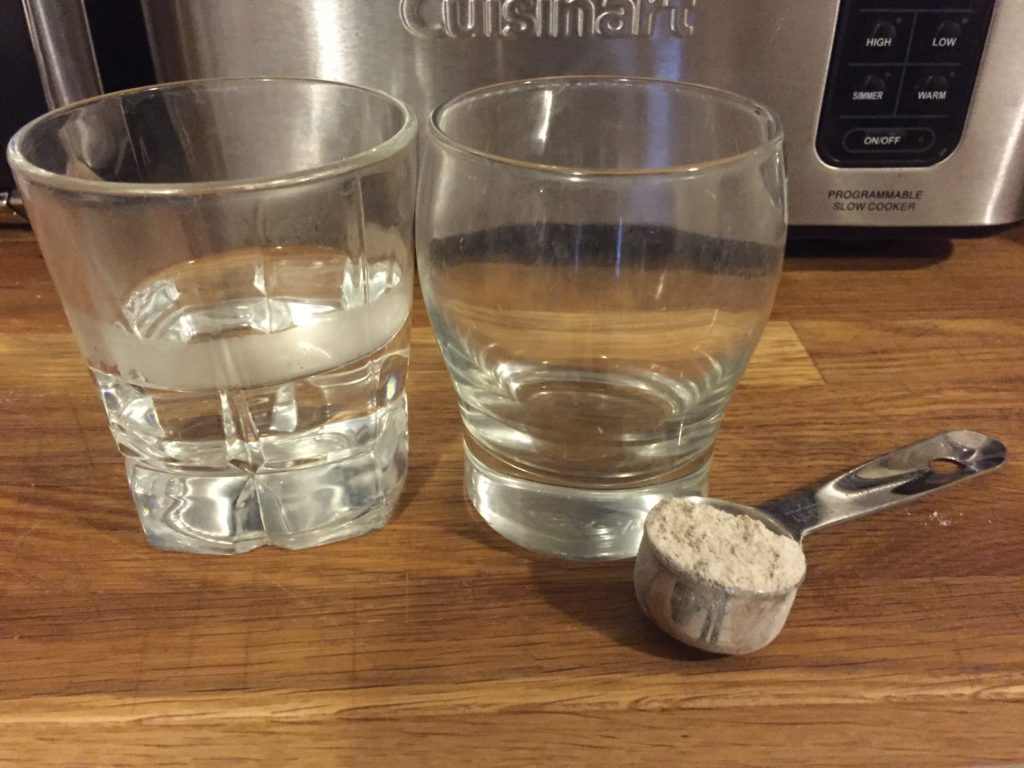
Day 1: In your mason jar, mix one tablespoon of whole wheat flour with one tablespoon filtered water at room temperature (if coming from the fridge, I’ll microwave my water for 30 seconds to get it slightly warm). Cover the top with cheesecloth and let it stand at room temperature overnight. You can use pretty much any flour you want. It took me longer to get good bubbles going with all purpose flour. Something like a whole wheat or rye flour is going to have more natural yeast and minerals in it, which are good for the bacteria.
Day 2: Obsessively check your proto-starter for tiny bubbles and other signs of fermentation. You shouldn’t see any yet but never hurts to check. Add another tbsp of rye flour and filtered water. You should be stirring these thoroughly to get lots of oxygen into the mixture.
Day 3-5: Continue feeding the starter daily. You can now add 2 tbsp of flour and water each time. At this point you should start seeing tiny bubbles form in the mixture several hours after it has been fed. Fermentation is happening! It should also start smelling bready, slightly sour and delicious.
Day 6-12: As your starter grows and the yeast population with it, things get Malthusian. There are exponentially more yeast mouths to feed but only so much room in the jar for more flour and water. So we need to thin the herd. Before each feeding, start pouring out about half the existing starter. This will improve the yeast-to-flour ratio and provide a better environment for your yeast to multiply and produce a rich flavor. At this point you don’t need to measure out your flour and water exactly – just add enough to keep it the consistency of pancake batter.
Ongoing Care
You now have a ready-to-use sourdough starter. It should be bubbling nicely starting a few hours after feedings and have a bready odor. You can now transfer it to the fridge where it can go 7-10 between feedings.
When I feed my starter that’s been kept in the fridge, I usually take it out and give it a few hours to come to room temperature, do the pour and feed, give it a good stir, wait an hour or two, and then back into the fridge.
One or two days before you bake, it’s a good idea to take the starter out of the fridge and give it a few feedings (spaced 8-10 hours apart) so it can “wake up.” This is also an opportunity to build up the starter volume so you’ll have enough to bake with, with some left over to keep the starter going.
Starter Troubleshooting
- No Bubbles / Activity: Make sure you are using filtered water, and keeping your starter in a warm but not hot place. Try switching to rye, or a heartier organic type flour. These tend to have more yeast in them. Keep trying with smallish feedings and make sure you are stirring vigorously to aerate the mixture. Go a little heavier on the flour (sometimes bubbles can escape rather than stick in the starter if your starter is too liquidy). If you don’t see any bubbles after 10 days or so I’d start over using the pineapple juice method linked above.
- Something growing on it: Some people will tell you to scrape the mold off and feed again. That’s gross. Just dump it out and try again.
- Dark, funky liquid on surface: Your starter is not being fed enough. Dump out a good amount of the starter and give it a healthy feeding. It should return to normal smell in 1-2 feedings.
CHAPTER 3: Make Bread
Day Before
When you bake, you want your starter to be nice and active. So if you’re keeping your starter in the fridge, take it out the morning before and give it two healthy feedings. Make sure the feedings get your starter up to at least a cup and a half, so you’ll have enough left over to keep it going after you take some out to bake with. Leave it out at room temp overnight.
Day 1 Early AM
Initial Mix (Autolyse)
In your large mixing tub or bowl, combine your 7.5 cups (1,000 g if you’re using a scale) of whole wheat flour, 7.5 cups (or 1,000g) of white flour and about 6 cups of filtered water.
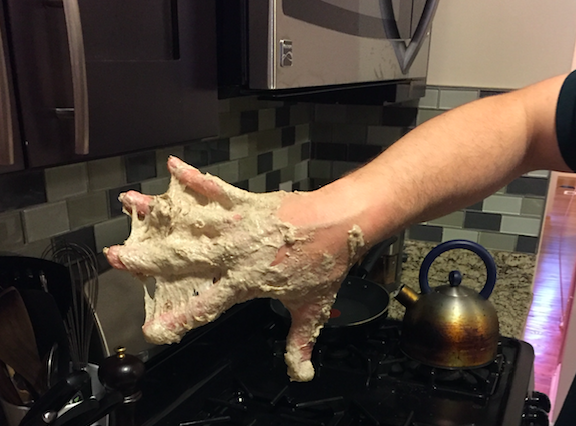
Use your hands to make sure everything is well mixed and scrape down the bottom of the container to minimize sharp dried dough bits that can slice your precious gluten stands as they develop.
This stage also has a ‘feel’ element that may take a couple bakings to get right. You want the dough in a sweet spot where it’s fairly moist – more moist than most doughs I’ve worked with. This gives the bread a springy texture. But you don’t want the dough to be so sticky it sticks to the pizza peel when you’re sliding it into the super hot oven.
A rule of thumb: if you can put the dough down and it doesn’t stick to your fingers it’s too dry, add more water. If you need to wash your hands a bit to get the dough off it’s just right. If you need to scrub each finger, fingernail, etc to get the dough out of every nook and cranny then it’s too wet and you should add more flour. You can add small amounts of flour or water to get the consistency right. This won’t screw up the bread. Stop mixing once you’re happy with the texture and everything is combined.
Cover the dough with a damp cloth and let sit for about an hour. Notice we have not yet added the salt or starter. This pre-salt period is called the autolyse. It is giving the yeast in the starter a chance to chow down on the flour without any salt to slow down fermentation. The flour also has a chance to soak up more water and start forming delicious, delicious gluten.
Day 1: Mid AM
SALT, STARTER & BULK FERMENT
Uncover your dough and sprinkle in 6 tsp of sea salt (36 grams if you are weighing) and about 3/4 cup of starter.
Work the dough with your hands until everything is well combined. This should be tiring but not forearms-on-fire tiring. If it feels like you’re about to pop a tendon in your arm, you may add a bit more water.
As you knead, the dough should start out shaggy, with little peaks all over. As you develop it throughout the day, it will get smoother and start to develop strength.
Day 1: Late AM / Early Afternoon
Over the next few hours (ideally about 30 min apart) perform a series of “turns” of the dough. The idea of a turn” is to stretch the dough and fold it without squeezing out the gas bubbles that are forming as the dough ferments.
To do this, just use your hands to release the dough from the sides of the bowl / tub, pull the dough up as far as it will go without breaking and fold it over towards the center. Then rotate the bowl a quarter turn and repeat until you’ve gone all the way around. Then re-cover the dough and let is go back to resting.
After 5-8 rounds of this, midway through the afternoon you should notice the dough taking on a domed shape in your bowl. This is a good sign that the dough is developing gluten and getting stronger.
Day 1: Early Evening
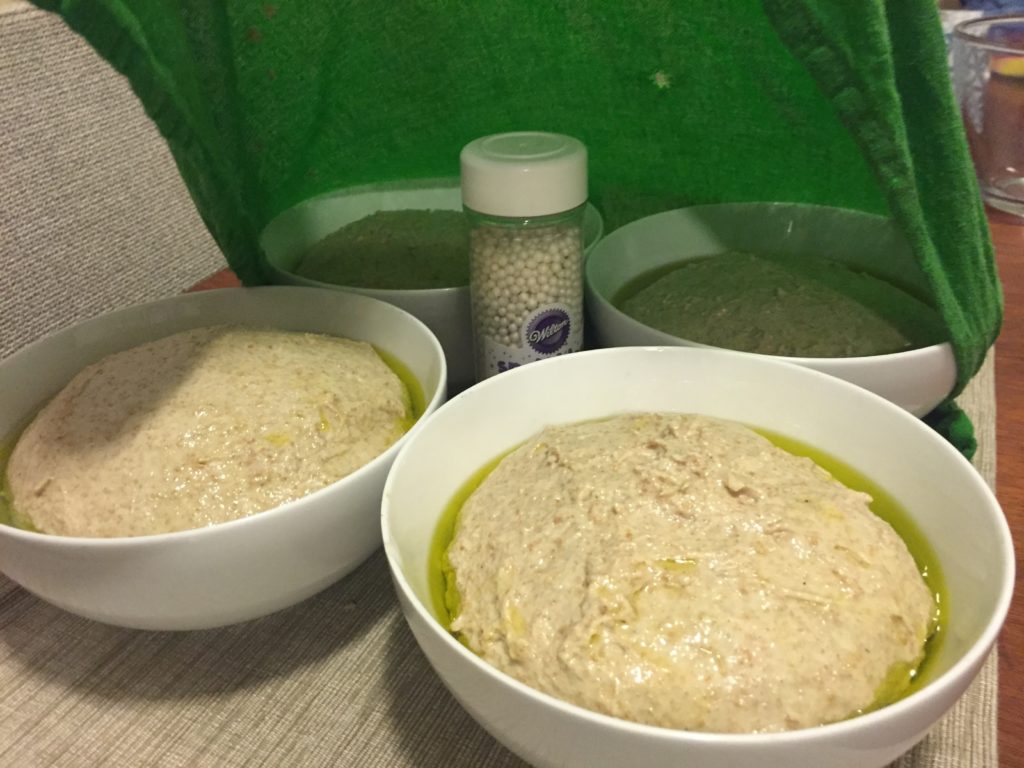
Once your dough mass has a nice dome on top (or about around dinner time), it’s time to separate it into loaves. We will use cereal bowls (other recipes call for cute, individual baskets. These will amp up the Martha Stewart factor but are not necessary).
Take about a quarter of the dough (doesn’t have to be exact, you can always top up the runts later) and start folding it. Stretch one side of the dough out a bit and then fold that back over the center, then rotate it a bit and repeat. As you do this a few times, your dough will get a tight dome-shaped top. There will come a moment — and you will develop a sixth sense for this after a couple loaves – when the dough is perfectly formed into a tight little package.
Now, we need a way to keep our loaves moist while they proof. I have developed this patent-pending rising tent design, consisting of a bottle of sprinkles to keep the moist cloth off the dough as it rises.
You are now t-minus an hour or two till bake time.
PROOF & PREHEAT
Your sourdough bread is now “proofing,” or doing its final pre-bake rise. This could take anywhere from 1-3 hours. The dough should rise noticeably in the bowls during this time.
The dough is ready for baking when you can poke a wet finger into the dough and the indentation remains at first, but then slowly rises out.
Time to get the oven ready. Make sure your pizza stone is clean and position it in a middle rack of the oven. Put your cake pan at the bottom of the oven and fill it with water; you will probably need to re-fill this once during your bake.
About an hour before bake time, turn on your oven to 515 F. Before baking, you want to go about 20-30 minutes beyond your oven’s standard preheat time because the pizza stone needs more time to heat up.
BAKE
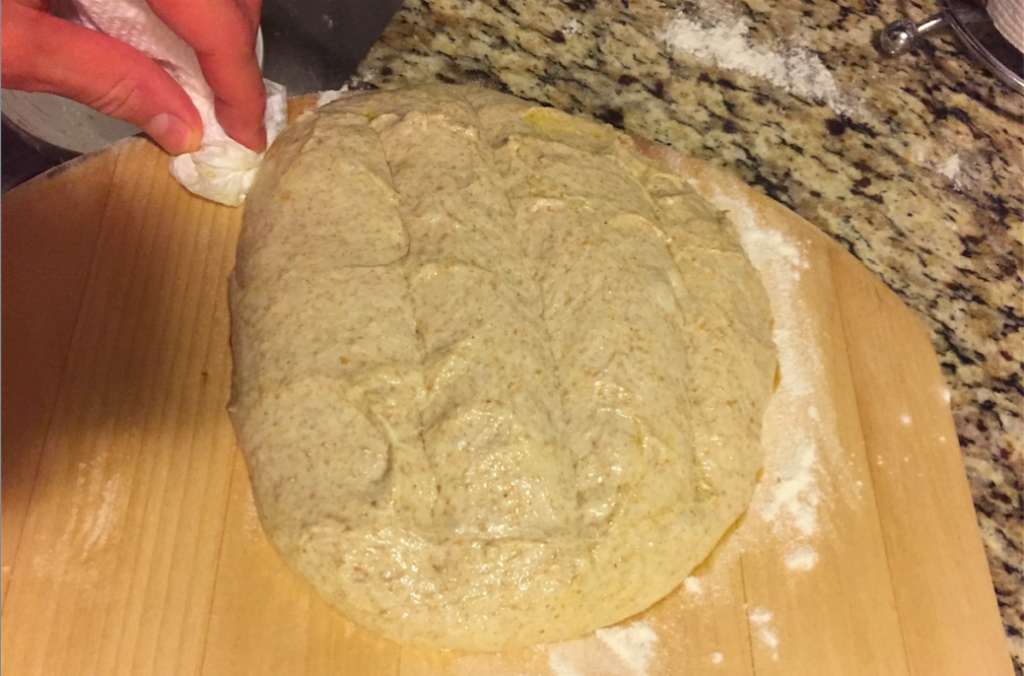
Assemble your baking station. You’ll need your pizza peel, thermometer, x-acto knife, some white flour, a paper towel, spatula, and of course your doughs all within easy reach.
Sprinkle a pinch or two of flour into your pizza peel, and spread it evenly over the front. Take one of your doughs and carefully pour off excess olive oil around the edges. Gently plop the dough onto your pizza peel, using your fingers to release the dough from the bowl if necessary. Using the paper towel, scrape off the excess flour from around the dough’s edges. This will prevent it from getting transferred onto the pizza stone where it will get instantly scorched, setting off all the smoke alarms in your place.
Using the X-acto knife, cut 2-3 quick slashes down the length of the bread loaf and then transfer the dough onto the pizza peel, using a spatula to dislodge any sticky areas and re-form loaf if needed.
Set a 15 minute timer. When it dings, use the thermometer to check the temp in the center of the loaf. The loaf is done when it reads 180-190F. The first couple loaves will take a few extra minutes. Later loaves may take a bit less time as the oven and pizza stone continue to heat up.
Using the pizza peel, take the bread out (you may need to chip away some at the bottom to get it unstuck) and transfer it to a cooling rack.
Using any scraps of willpower remaining, try to resist the urge the cut into the bread right away. It is still cooking for about 45 minutes after coming out of the oven. If you cut in too early the center will be gummy and mess up the texture of the entire loaf.
Repeat this stage to bake the next four loaves. I’ve found that it’s best to do the loaves one at a time. If my oven and pizza stone were slightly wider, I’d do two at a time.
EAT SOME, FREEZE THE REST
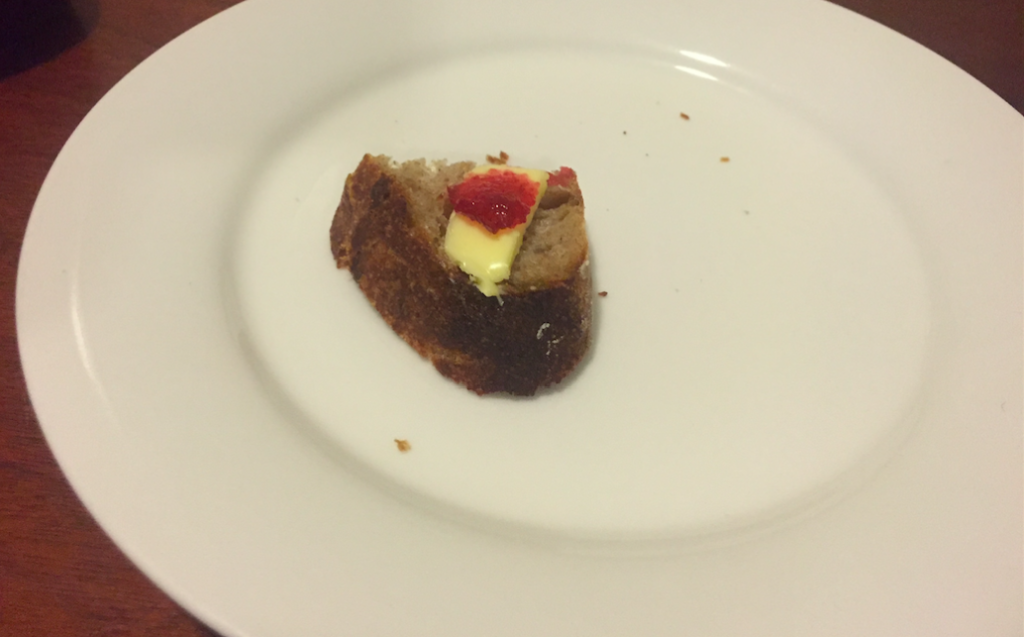
Make sure you’ve got some high quality butter and jam on hand.
After the breads cool, I keep the ones I’m going to eat in the next few days wrapped in a kitchen towel on the counter. The others I freeze in large ziplock bags. These loaves freeze really well and defrost quickly when you’re ready to eat.
Note: This recipe is an amalgamation of many recipes and my own experimentation. But special credit is due to the excellent sourdough bread tutorial at Splendid Table by Kiko Denzer and Hannah Field.
APPENDIX: Printable Sourdough Bread Cheat Sheet (Click to download PDF)
It’s hard to navigate a wall-of-text recipe with your hands full of sticky sticky dough. So here’s a handy one-pager you can print out to keep with you in the kitchen as you bake.
Sourdough Bread
Ingredients
- 12.5 cups flour (mix and match all purpose, whole wheat, and bread flour). My preferred ratio:
- 6 c All purpose
- 3 c Wheat
- 2 c Rye
- 1.5 c Quick oats
- 5.5 cups filtered water, room temp
- 4.25 teaspoons sea salt
- 1 scant cup sourdough starter
Day Before
Feed starter in AM and PM
Baking Day
-
- “Scald” 1 cup flour with 1 1/2 cups boiling water
-
- Add 1 1/2 cups cold water to the above and stir, let cool a bit
-
- Combine with 11.5 cups flour, 2.5 cups water, and 1 cup starter (mixed well to pop bubbles). Knead until combined. Make sure dough is not too dry. Add more water if needed. Dough should stick to your hands, but not too much
-
- Let stand for ~1 hour
-
- Add 4.25 tsp salt and knead dough for 15 minutes, until it forms thin sheets when stretched
-
- Cover dough with damp cloth and let rise for 1-2 hours. Knock back (gently compress dough to pop air bubbles) once or twice
-
- Divide and fold dough into 4 tight sourdough bread balls. Place in small bowls, greased with EVOO. Cover bowls with damp cloth and let rise for 2-4 hours
-
- Make sure your pizza stone is in right position. Preheat oven to 515 and put a pan with water at bottom of oven
-
- Dough is ready to bake when a dent made by a wet finger remains (but then slowly puffs back out)
-
- Put dough onto floured pizza peel, slice top with an exacto knife, and slide into oven
-
- Bread is done when an inserted thermometer reads 180-190F (about 15 min). Do not let go over 190.
-
- Take bread out with pizza peel and place on cooling rack for 1 hour before eating
-
- Bake remaining loaves, refilling water in bottom of oven as necessary
- Eat some, freeze the rest
If you want to make rising go faster: Heat dough slightly while rising (eg turn up thermostat, place dough in oven with boiling water poured into a pan at bottom).
